Essentially, the process of ‘sighting in’ your rifle’s scope is among the most basic, as well as the most crucial things you’ll have to learn. The process can be fairly simple or complex depending on how you want to get it done, but the fundamentals are decently easy to grasp.
We’re here today to explain the process in several easy steps, so kick back and take notes.
Contents
Steps Of How To Sight In A Rifle Scope
Step 1 – Check your scope mounts
The first is, in other words ‘better safe than sorry’. It’s tightly correlated to accuracy and has very little to do with the actual ‘sighting’ process in itself, but it’s an important step since it will be extremely hard to backtrack at a later point.
So, what we mean by ‘check your scope mounts’ is simple – ensure that the mount is tightly fit (although not too tight) and not loose. A loose mount will in most cases make your rifle inaccurate. You can use a simple torque wrench to adjust the screws around the scope mounts.
Step 2 – Find the turrets
The turrets are located under the caps (which are located at the very middle of your scope and are only visible after unscrewing the covers). These ‘turrets’ are meant to be used to adjust the reticle/crosshairs.
The only thing you need to know about adjusting the turrets is that you should not under any circumstances force them. These rifle parts are fairly flimsy and need to be used with great care.
Step 3- Use the turrets to adjust the scope
Now that you’ve located the turrets, it’s time to use them to adjust the scope. If you’ve done everything so far correctly, the turret on the top will govern the up/down segment of the scope, and the turret on the right will be used for left/right adjustment.
Though most scopes come with a similar set of turrets (and can be used in almost exactly the same way), different scopes may come with different adjustment increments per 100 yards.
Step 4 – Level adjustment
Once you’ve done the turret adjustments, it’s time to level your scope with the action. You’ll need leveling tools for this step (which aren’t all too expensive, systems of average quality don’t cost above $100).
Apart from the overall leveling, there are also tools that can be used to level your crosshair as well. The latter is not mandatory, but it will greatly help you increase the overall accuracy of your rifle.
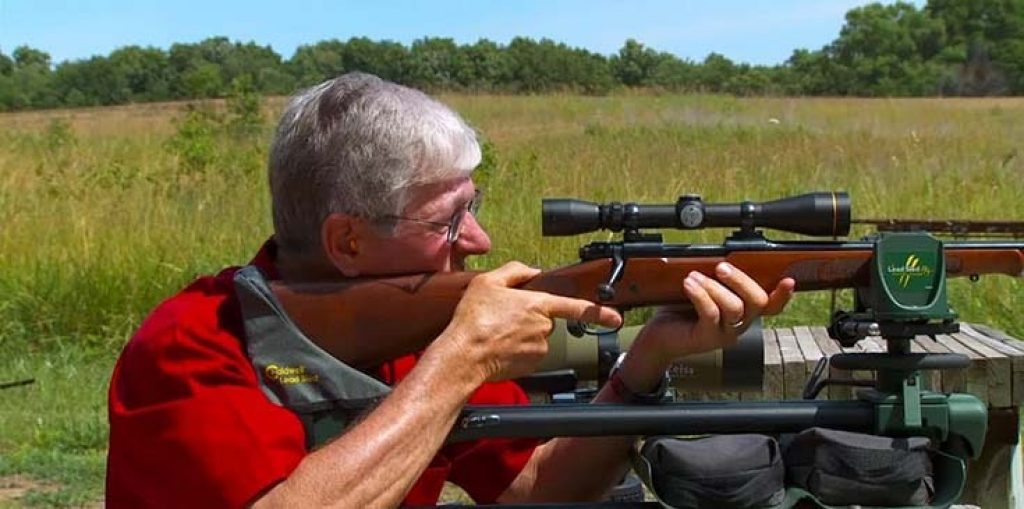
Step 5 – Trying your scope on an actual target
There’s a strong possibility that your gun vendor told you that the gun you just purchased is bore sighted. It’s interesting that this is rarely the case because thousands and thousands of people have reported that their rifle is inaccurate at first shot. What that means is that bore sighting needs to performed (with the bore sighter tool) on every new gun.
In order to actually determine the accuracy of your sighted scope so far, there’s no better way than by getting a shot.
Get a couple of sandbags, buy or draw a target yourself (try to get the biggest possible, the size matters for the next step), and prepare to take a single shot. Don’t set your target too far (ideally, start with 25 yards).
Step 6 – Check how big is the error
There’s a one in a million chance that your sight will be 100% accurate after your first try. Now, the reason why you’ve taken a shot with an inaccurate rifle is that you’ll need to re-do the process with the information you’ve got from the target.
Check your turrets to check back on the aforementioned increments. If it reads 100yd, and you’ve set the target to 25 yards, a single click equals to a sixteenth of a single inch in this scenario.
General Tips Of Sight In A Rifle Scope
New shooters can get discouraged rather easily, as the process of ‘sighting in’ has so many steps and so many details that are actually so specific that making even the slightest detours might lead to mistakes and errors.
Note that there are various factors that determine the accuracy of your shot, but there’s also a totally different set of factors that determine the accuracy of your rifle (scope).
First and foremost, their distance between you and your target is the universal factor that affects both ends of the spectrum. There’s a phenomenon that’s known as the Coriolis effect (in physics) which is described as ‘an inertial force that acts on objects that are in motion within a frame of reference that rotates with respect to an inertial frame’.
What this means is that your bullet rotates and travels a certain path and is affected by both gravity and wind. No matter how good you adjust your scope, if you don’t take the Coriolis effect in the equation, your shit will eventually appear inaccurate.
How to improve your scope’s position
One of the best tricks to correctly adjust your scope is by firing three-shot groups at targets at varying distances. The reason why three is so important here is that an odd number will help you triangulate the error (for example, five could do the trick, as well as seven, but ammo is expensive).
It doesn’t matter whether you remember which shot was taken first (or which was the first hit), all that’s important is that you actually give it your best and hopefully, hit the target all three times.
If you aimed at the center all three times, you should notice a pattern in these three shots. For instance, if they’re lined up in an upward or downward fashion, diagonal or such, you should simply slightly readjust your scope in the opposite direction.
If the target is 200yds away (or more) and the shots are obviously spread out, there are two factors you might’ve missed out on – the Coriolis effect, or your aim declined. Also, whenever in doubt, check in your rifle for maintenance to see whether it’s in good condition.